


- Airbrush Paint vs Thinning Normal Paints
The trick with thinning down paints is that you need to find the sweet spot on a scale of thin to thick. If you don’t thin down your paint enough, your airbrush will clog. If you thin it down too much, then you’re painting with a wash.
If you can afford it, have the room and don’t want the hassle of thinning paints, then by all means buy another line of paints. To avoid this extra expense, you might as well at least try thinning. Another reason to thin is you already know how your current paints eventually dry out - well, double the paints means you're using some half as often, means you may end up wasting more paint.
- Mixing in cups, bottles or the airbrush itself.
When using cups and bottles, you can either mix enough for a painting session or a whole bunch so that later you’ll have some premixed paint of the same colour and consistency as you had before.
I like mixing directly in the airbrush’s pot as you don’t waste paint that way. (Think of all the paint that’s left on a container when you pour it out.) Yes, it’s a little trickier this way since you can’t see it as well, so you’ll just have to learn the consistency that flows best and judge it by how well it mixes. One thing to watch is that whatever you use to mix the paint won’t scratch the reservoir of the airbrush; I like to use a toothpick... wood and plastic good, metals bad.
- Thickness and Pressure
The reverse is that if your paint's too thin, then using a higher pressure will wash it right out.
- Thickness and Cleaning Frequency
- Surface Tension
 |
Anything that aids flow reduces the surface tension. This means instead of a drop of liquid creating a "bead", it will be more likely to just flow. When it flows more naturally, everything gets an even coat of paint, unlike a wash where the crevices fill up more.
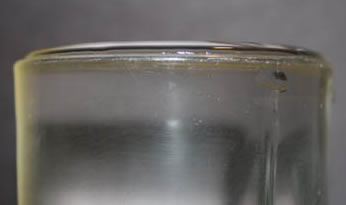
What do I mean by "surface tension"? When you fill a glass all the way to the top with water, the water kind of curves out a bit instead of spilling immediately - that means it has a high surface tension.
Off-topic example: Vinegar in a small bowel will attract fruit flies, which land on the liquid and drink - surface tension prevents the flies from sinking. A little dish soap mixed in with the vinegar will lower the surface tension and when the fruit fly lands, it can no longer walk on top of the liquid, sinking to the bottom of a bowel, drowning.
- The Sweet Spot
As you get into using different types of thinners, they'll have different affects on how the paint flows and beads. Water works for practicing and learning consistencies, but eventually you'll want to thin with something else. I'll get into details on different thinners later.
It's going to take some practice, and I strongly suggest buying at least one airbrush paint so you have an idea of the consistency you're aiming for.
 Take a look at the Wargaming Tradecraft Techniques Page for links to the entire Airbrushing series and other tips, tutorials and information.
Had lots of problems until I found that 'sweet spot'. And it gets messed around as the weather changes etc.
ReplyDeleteThese airbrushing articles are really good. Keep em coming :)
ReplyDeleteI too like to mix paints sometimes straight in the cup and I've found out that old, long sprue bits are great along with toothpicks.
I hate when I get dead fruit flies in my bowels.
ReplyDelete